How to Get Your Serial Number from Command Prompt (Windows 11)
Support desks, warranty checks and repair shops all ask for your PC’s serial number, and you don’t have to flip the laptop over to find it. This guide shows how to get serial number from Command Prompt on Windows 11 with one line, why the old wmic bios get serialnumber command now fails on most PCs, and what to do when the result comes back blank. If you’re not sure which window to use, see PowerShell vs Command Prompt.
Tested on: Windows 11 Enterprise 25H2, Lenovo ThinkPad T14 Gen 6, in Command Prompt and Windows PowerShell 5.1.
Quick fix
- Press Start, type cmd and open Command Prompt.
- Type
powershell -Command "(Get-CimInstance -ClassName Win32_BIOS).SerialNumber"and press Enter. - The line that comes back is your serial number. On older Windows,
wmic bios get serialnumberstill works.
In this guide
Why wmic bios get serialnumber stops working
For years the standard answer was wmic bios get serialnumber. WMIC is the old command-line front end for Windows Management Instrumentation (WMI), and Microsoft deprecated it back in Windows 10, version 21H1.
It’s now gone. WMIC is removed by default from new installs of Windows 11, versions 24H2 and 25H2, and since August 2026 it can’t be added back as an optional feature either. If you type the command on one of those PCs, Command Prompt replies ‘wmic’ is not recognized as an internal or external command.
Only the WMIC tool was removed. WMI itself still works, and PowerShell reads exactly the same serial number through the Get-CimInstance command. You can run that command straight from Command Prompt, so nothing changes about where you type it.
How to get serial number from Command Prompt
Use method 1 on any current Windows 11 PC. Methods 2 and 3 are for when you’re already in PowerShell or on an older PC that still has WMIC.
Method 1: Run the PowerShell command in Command Prompt
- Press Start, type cmd and select Command Prompt. You don’t need to run it as administrator.
- Type or paste the command below and press Enter.
powershell -Command "(Get-CimInstance -ClassName Win32_BIOS).SerialNumber"powershell -Command starts Windows PowerShell, runs the text in quotes and returns the result to Command Prompt. Get-CimInstance -ClassName Win32_BIOS reads your PC’s firmware (BIOS) information, and .SerialNumber keeps only the serial number, so you get one clean line you can copy.
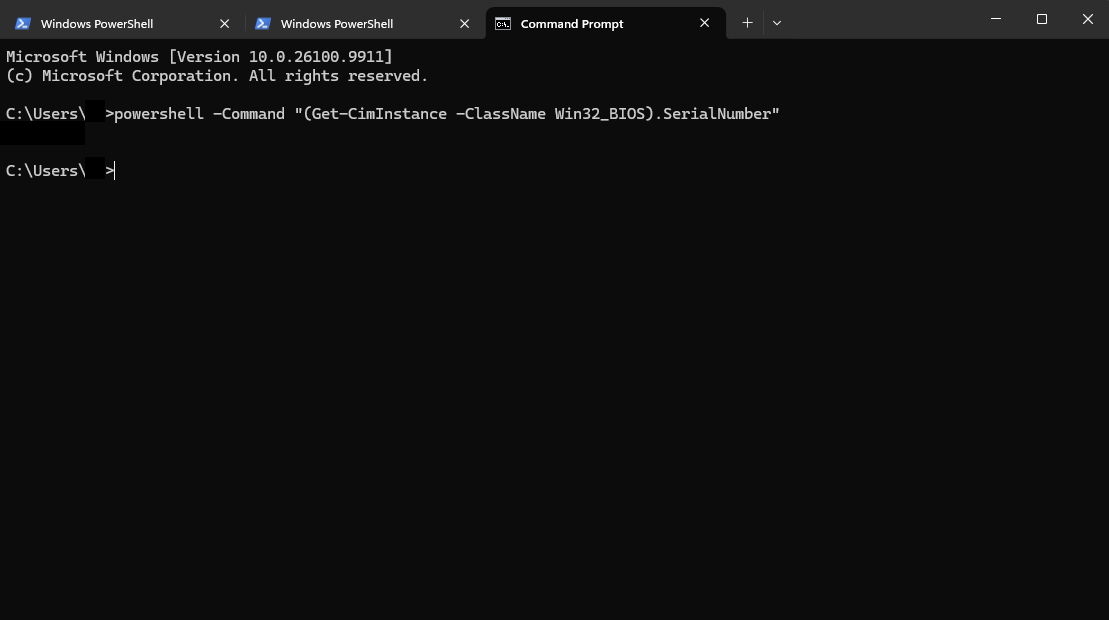
To copy it, select the number with your mouse and press Ctrl + C.
Save it to a file instead. Add > and a file path to the end of the line. Command Prompt then writes the result to that file instead of showing it on screen. This saves it to a text file on your desktop:
powershell -Command "(Get-CimInstance -ClassName Win32_BIOS).SerialNumber" > %USERPROFILE%\Desktop\serial.txt%USERPROFILE% is your user folder, so the file lands on your own desktop. Open serial.txt to see the number. It’s handy when you need to email it to a support desk.
Method 2: Use PowerShell directly
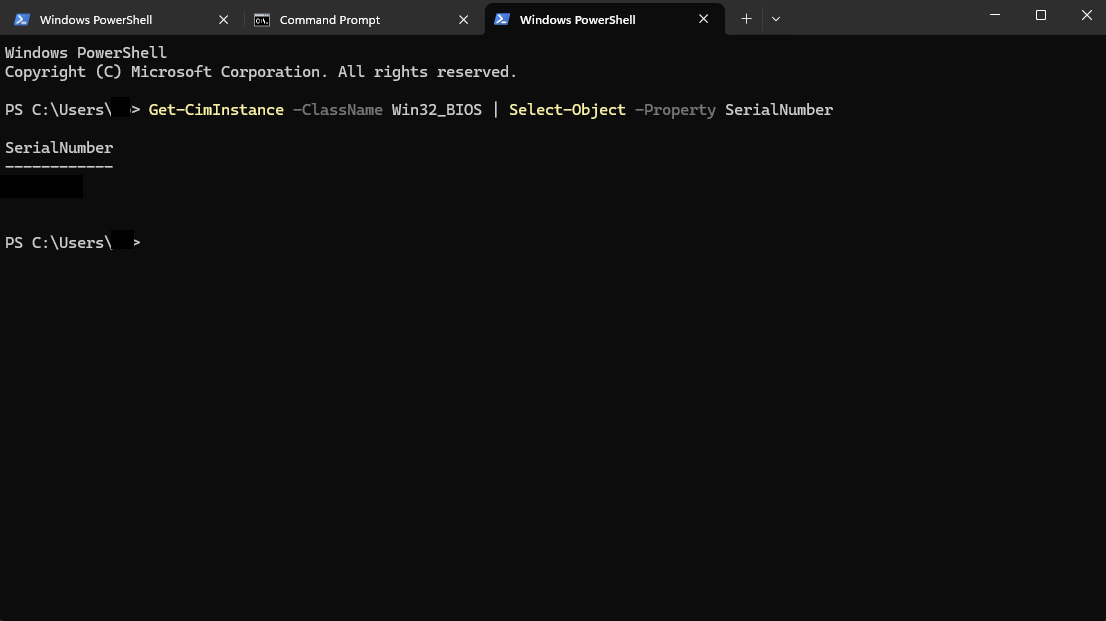
If you already have PowerShell or Windows Terminal open, you don’t need the powershell -Command wrapper. Run this instead:
Get-CimInstance -ClassName Win32_BIOS | Select-Object -Property SerialNumberThis shows the serial number under a SerialNumber heading. Run Get-CimInstance -ClassName Win32_BIOS on its own to also see the BIOS maker and version.
Method 3: wmic on older Windows
On Windows 10 and on Windows 11 PCs that still have WMIC (versions 23H2 and earlier usually do), the classic command still works in Command Prompt:
wmic bios get serialnumberIt prints SerialNumber followed by the number. If you get the “not recognized” error, use method 1. It works on the same PCs and won’t break when WMIC disappears.
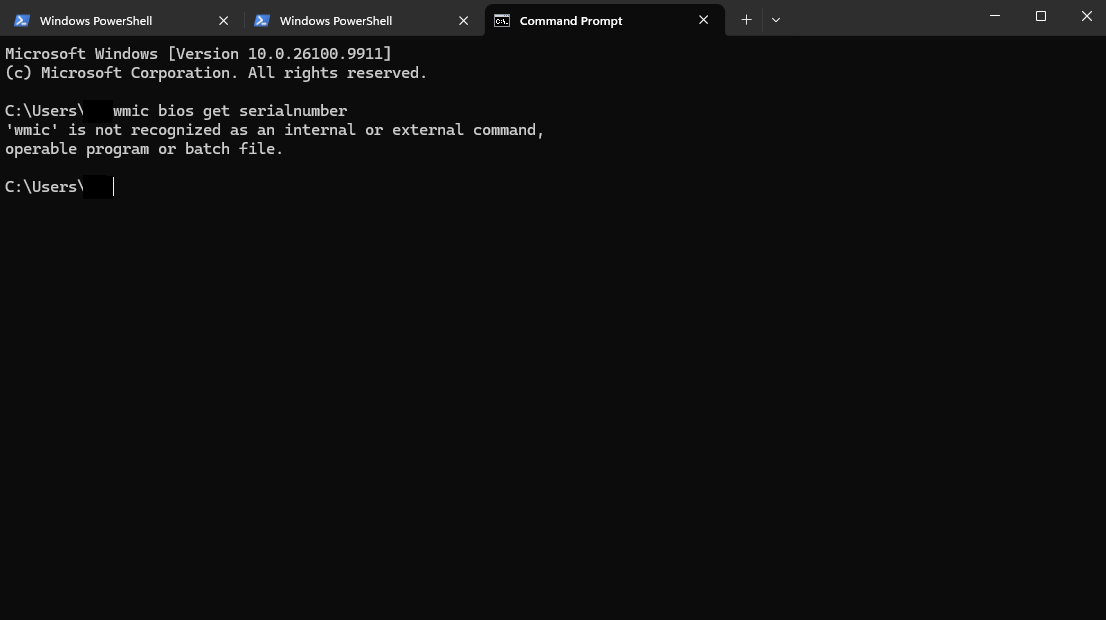
wmic is no longer recognized.Bonus: get the make and model too
Warranty and driver pages usually ask for the model as well as the serial number. This line shows both the manufacturer and the model:
powershell -Command "Get-CimInstance -ClassName Win32_ComputerSystem | Select-Object Manufacturer, Model"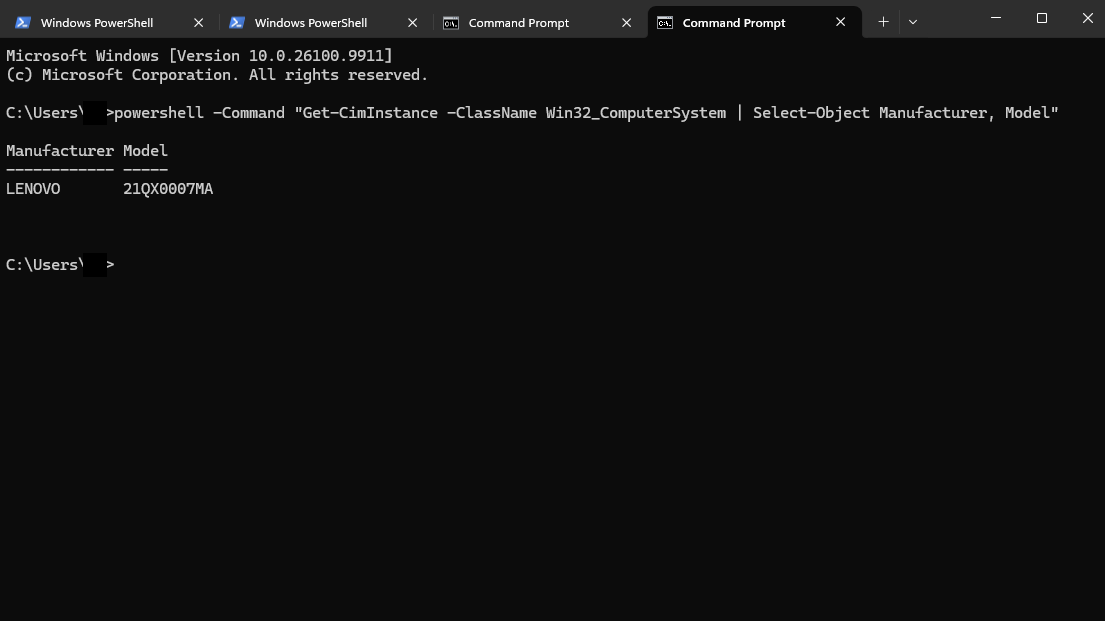
If that didn’t work
The result is blank, or says “To be filled by O.E.M.”, “Default string” or “System Serial Number”. The command worked, but the maker didn’t store a serial number in the firmware. This happens most often on custom-built desktops. Try the motherboard’s serial number instead:
powershell -Command "(Get-CimInstance -ClassName Win32_BaseBoard).SerialNumber"Win32_BaseBoard is the motherboard, so this returns the board’s serial number, not the whole PC’s. That’s usually what a motherboard maker’s warranty page wants.
Still nothing? Look for the serial number in these places:
- The sticker on the bottom of a laptop, or on the back or side of a desktop case.
- Under the battery on older laptops with a removable battery.
- The original box or the purchase invoice.
- Your PC’s BIOS/UEFI setup screen, on the main or system information page (steps below).
Open the BIOS/UEFI setup from Windows
Save any open work first, because this restarts the PC.
- Select Start > Power, then hold Shift while you select Restart.
- On the blue menu, select Troubleshoot > Advanced options > UEFI Firmware Settings, then Restart.
- Look on the first page (often called Main, Information or System Information) for the serial number. Exit without saving any changes.
If you don’t see UEFI Firmware Settings, restart the PC and press the maker’s setup key as it starts. Common keys are Esc, Delete, F1, F2, F10, F11 or F12, and the startup screen often shows which one.
Questions people ask
Why does wmic say it is not recognized?
WMIC has been removed from Windows 11, versions 24H2 and 25H2, and can no longer be added back as an optional feature. Use powershell -Command "(Get-CimInstance -ClassName Win32_BIOS).SerialNumber" instead. It reads the same serial number.
Is the serial number the same as the Windows product key?
No. The serial number identifies your hardware and comes from the PC maker. The product key activates Windows. Note that Win32_OperatingSystem also has a SerialNumber property, but that’s the Windows product ID, not your PC’s serial number.
Can I get the serial number of another PC on my network?
Yes, if remote management is enabled on that PC and you have admin rights on it. In PowerShell, run Get-CimInstance -ClassName Win32_BIOS -ComputerName PC01, replacing PC01 with the other PC’s name.
Do I need to run Command Prompt as administrator?
No. You can read the serial number from a normal Command Prompt window.
Related fixes
- PowerShell vs Command Prompt: What’s the Difference?
- How to Check Your Laptop Battery Health in Windows 11
- How to Find Your BitLocker Recovery Key in Windows 11
Sources: Microsoft Learn: WMIC · Removed features in Windows client · Working with WMI (PowerShell) · about_PowerShell_exe · Win32_BaseBoard class · Open the UEFI firmware menus